We often want to restrict access to specific part of an application from some parties. Moreover we usually want to do it with high flexibility at runtime, don’t we?
With the recent release of ano-site (version 2.4.1) we’ve added a brand new access control mechanism based on the ano-access framework. The idea was to make all parts of the application, that user interacts with, configurable from access point of view.
In this article we’ll make a brief overview of capabilities that are available in current version. It won’t replace comprehensive developer documentation, though.
Currently access can be controlled for such entities as:
- Page
- Box
- Navigation item
- Action
- Wizard
All configuration is done traditionally through ASG (ano-site content management system) which was enriched with two new modules for access control configuration: Ano-Access Configuration and Ano-Access Data. While latter is pretty straightforward, the former requires some explanation.
Main components and general structure of the framework illustrated in the Figure 1.
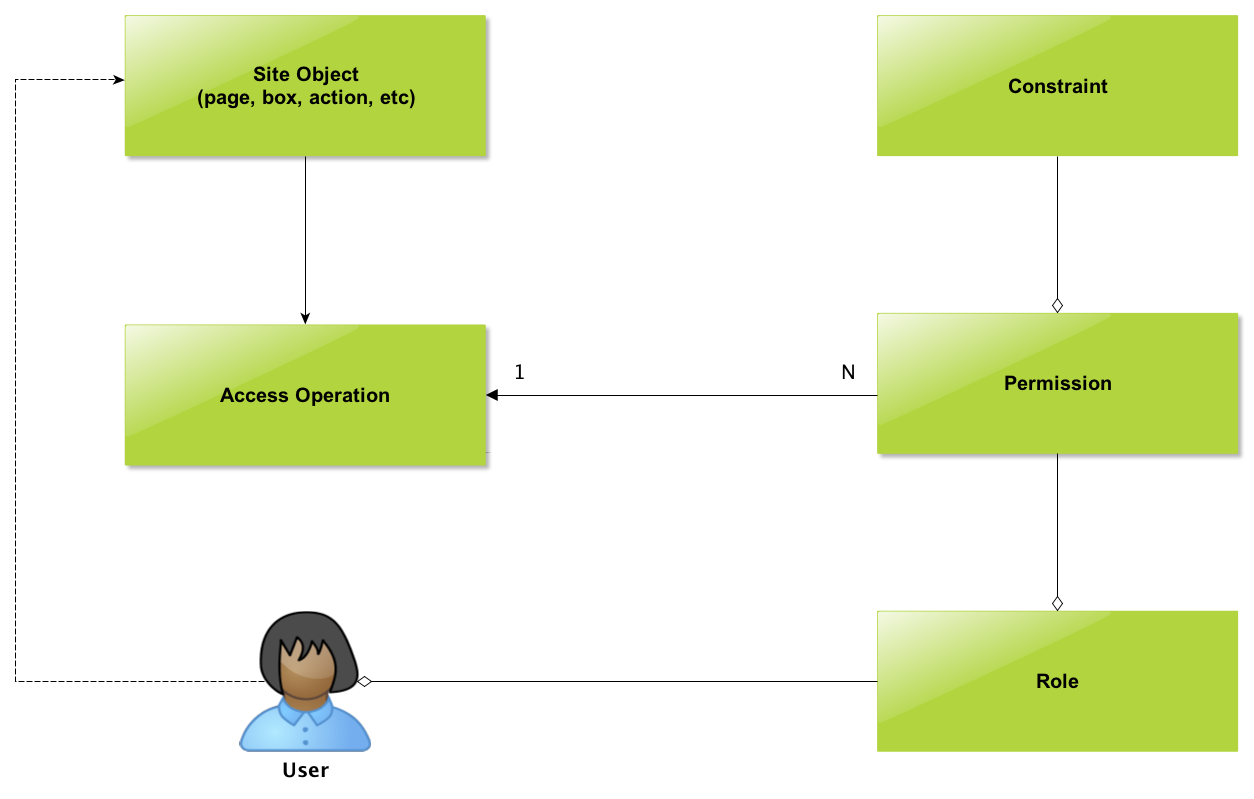
Figure 1. Main components of the framework
Central part of the mechanism is Access Operation. It’s an abstraction that represents some access activity. In our case, this can be page/box rendering, action execution and so on. Permissions (will be discussed further) are mapped to Access Operation (many permissions can be mapped to one access operation). Figure 2 depicts example AO configuration and, as you might notice, it’s rather simple.
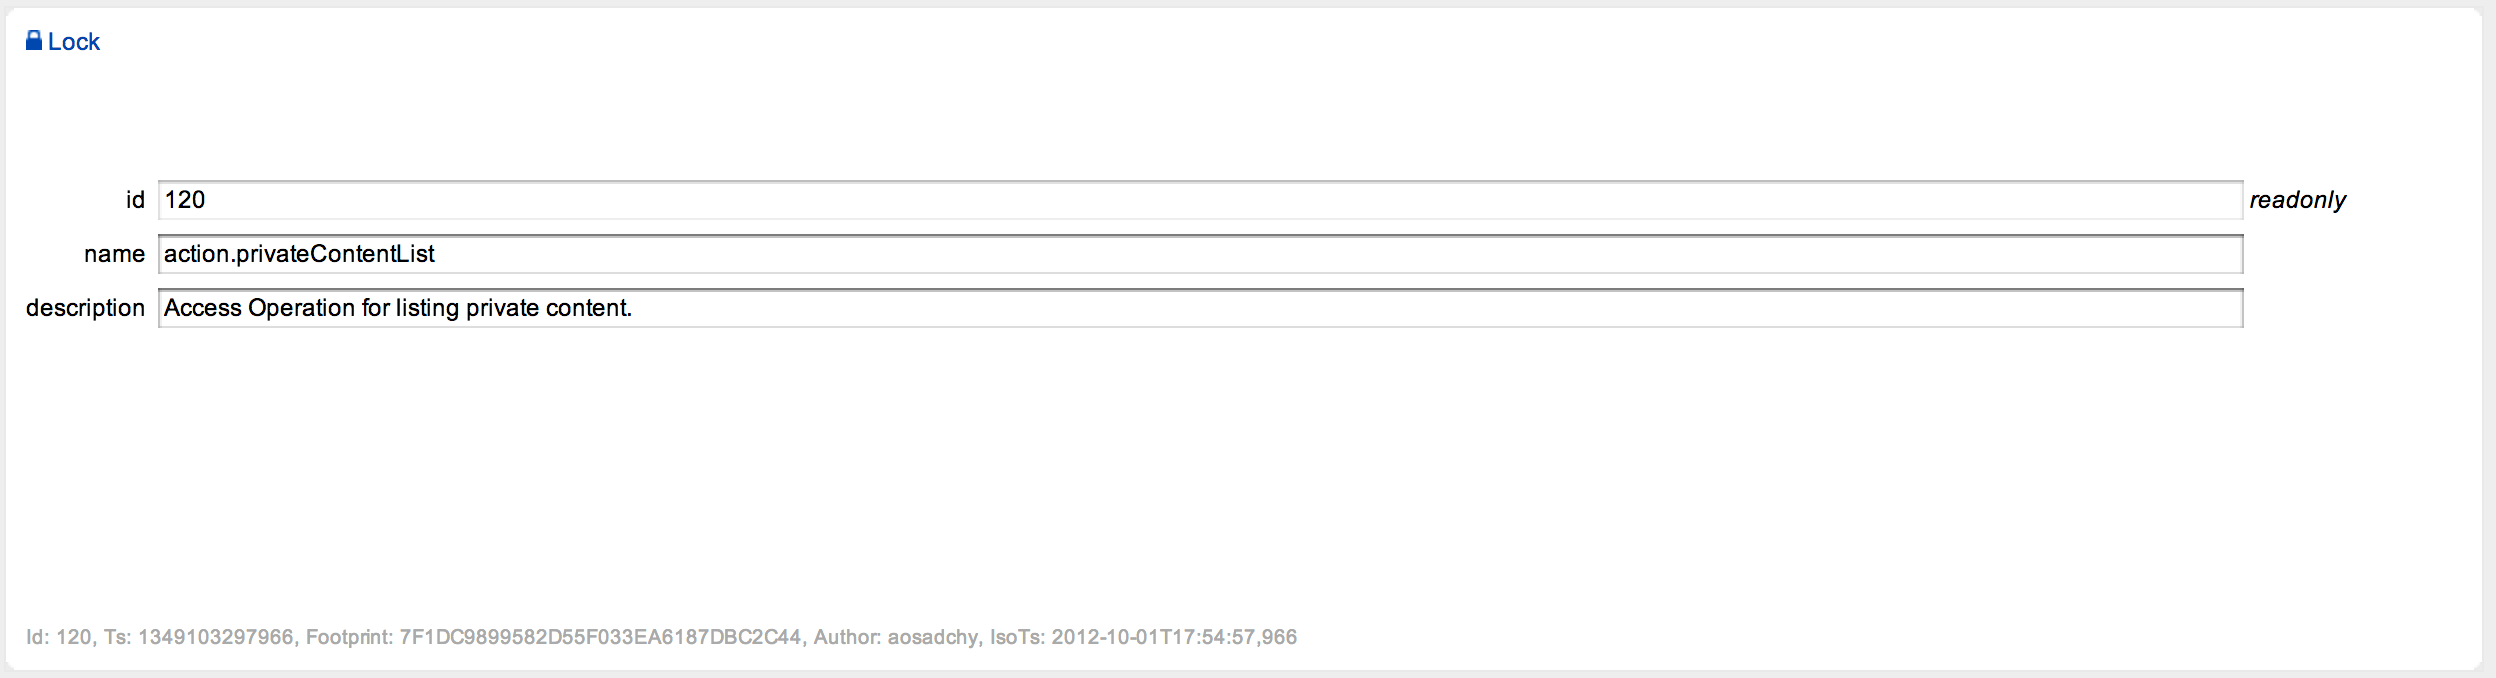
Figure 2. Access operation configuration in ASG
Permission, as its name implies, permits somebody to do something. In our case, permission allows rendering of the page/box/navigation item, passing the wizard or action execution in the context of particular user. Example permission configuration is shown in Figure 3. Here we’ve created one named action.privateContentList. Naming is arbitrary but we suggest to choose and stick with some reasonable convention. Permission can be denying (use “deny” option). Sometimes permissions can contradict – priority helps in resolving such conflicts.
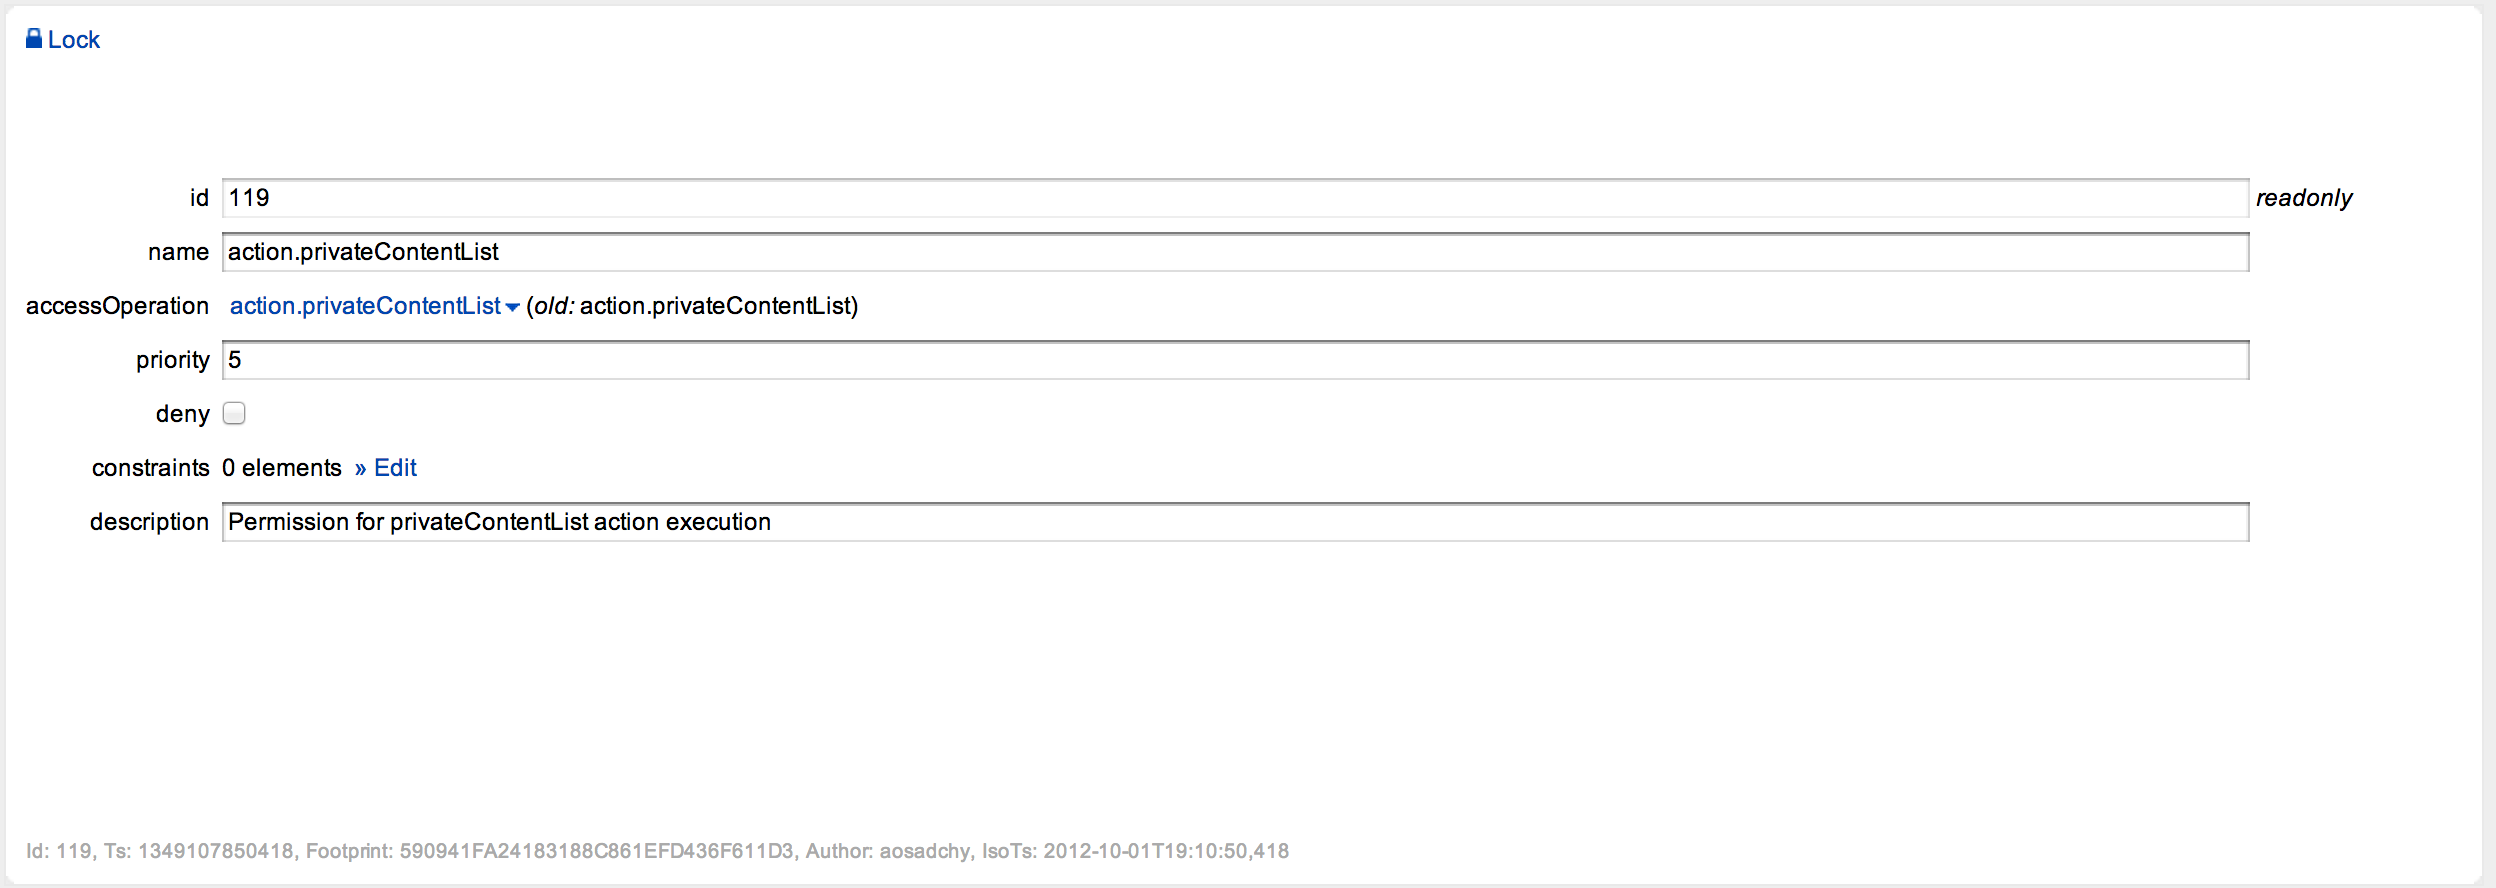
Figure 3. Permission configuration in ASG
Enabling access control for some element is just as simple as setting required access operation in the edit dialog. Figure 4 illustrates this on the PrivateContentList_Action.
Execution of this action is permitted only for users who owns action.privateContentList permission. Why? Because this permission is mapped to access operation that, in turn, is part of the action. Sound intricately, huh?
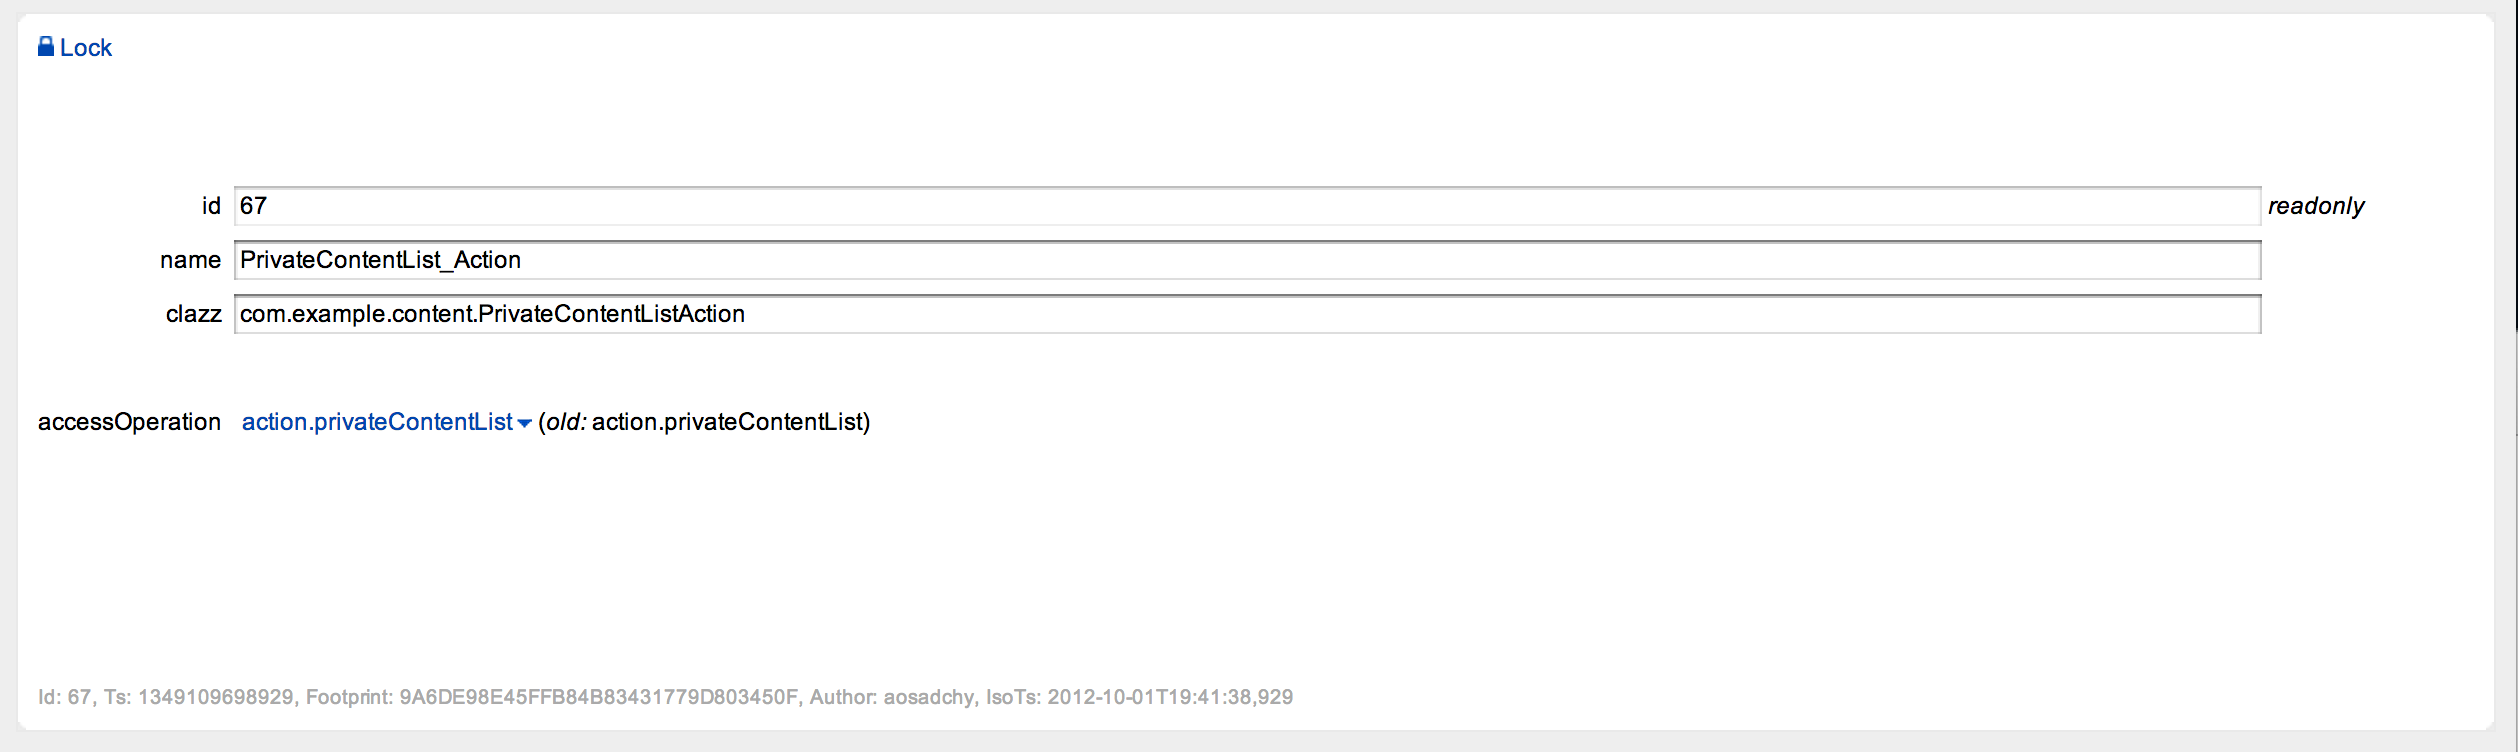
Figure 4. Example action configuration
But, how do I grant a user with a permission? This is where roles come into play.
Role is actually a set of permissions which defines type of the user from access rights distinction perspective. For example, suppose there are three roles: Restricted Member, Regular Member and Premium Member. For restricted members, who don’t even registered on your portal, you can disable certain functionality, which is available for Regular Members and display some ads instead. In turn, Premium Members will be allowed to use some unique and cool features without being annoyed with advertisements.
User can have many roles and this binding is done in “User Data” section of “Ano-Access Data” module.
Now, when you have some basic understanding of access control mechanism let’s go back to permissions to review some more advanced capabilities where you can show your Java-coding ninja skills 😉
Suppose, you have an invitation module. All users are granted with permission to send invitations but you don’t want them to send more that 10 per week. This can be done via constraints.
Constraints allow to impose some additional rules from application domain area on permission. To create one you have to provide Java class that implements Constraint interface also (for all details about implementation refer to developer documentation on ano-site and ano-access). For example, constraint might compare some attribute under the given name with predefined value.
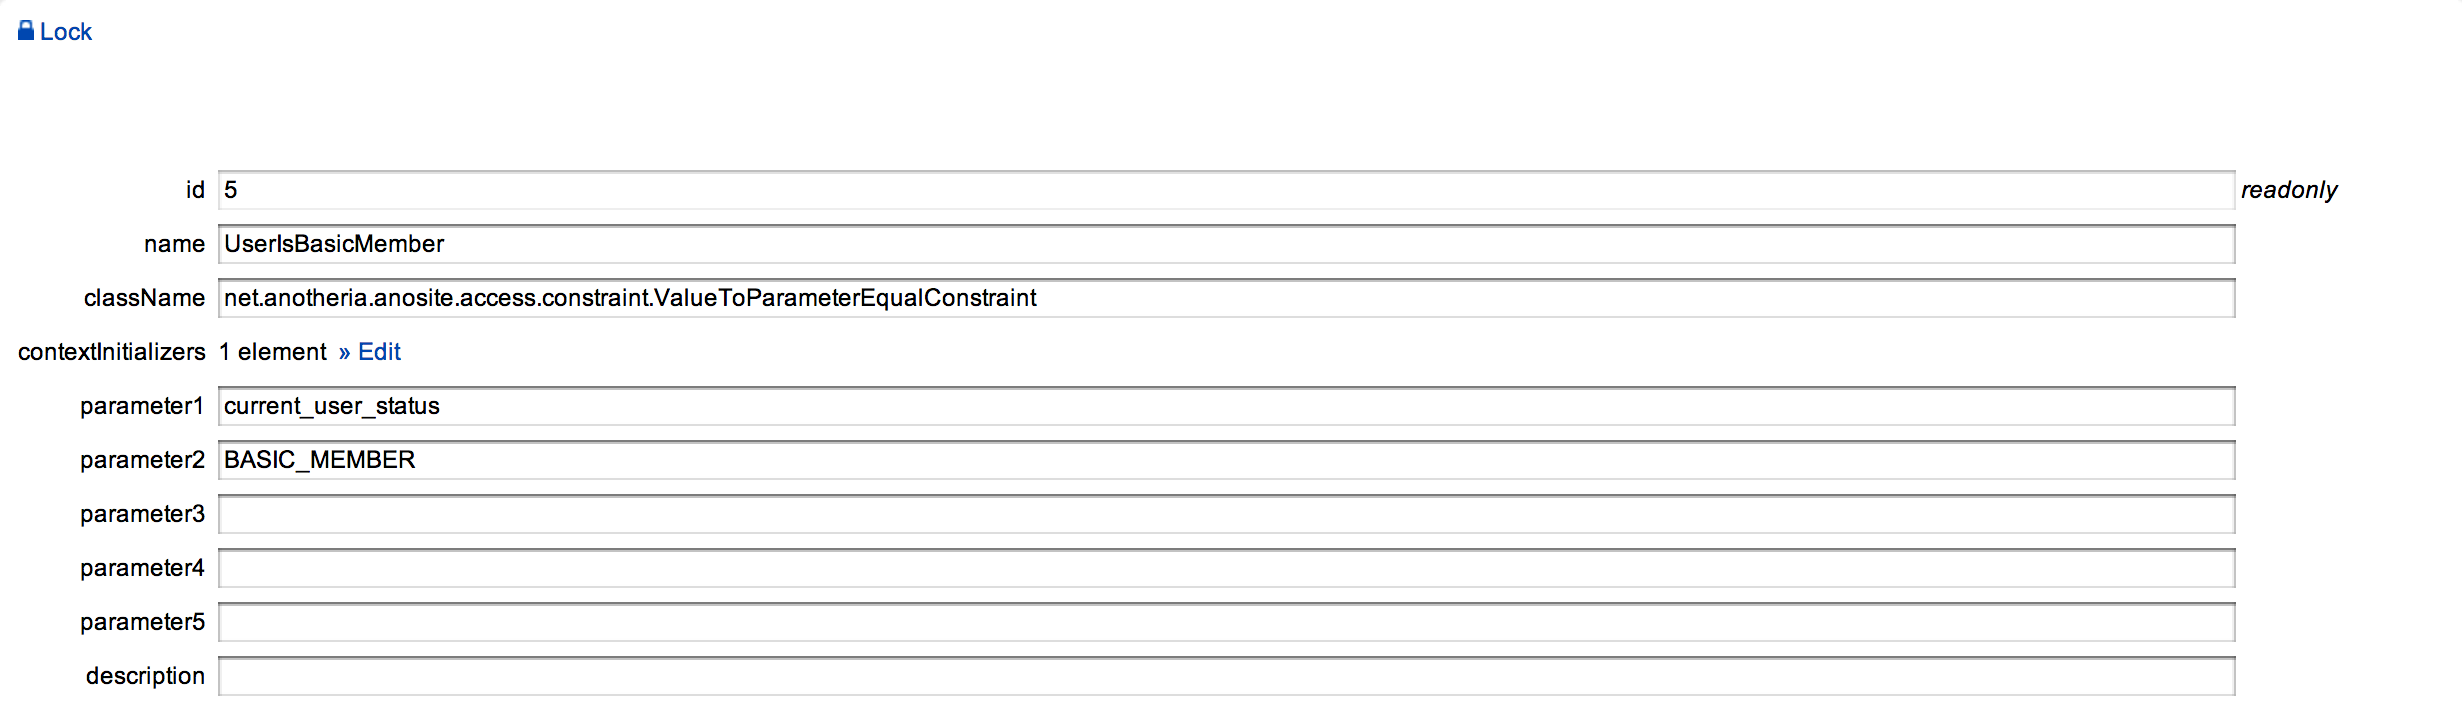
Figure 5. Constraint configuration
In the Figure 5 you can see the example constraint that compares attribute value with the name in “parameter1” field with the value in field “parameter2”. Based on this comparison decision whether to allow action or not will be taken.
To provide constraint with all required attributes Context Initializer has to be created. To add context initializer write a class that implements SecurityContextInitializer interface, override its sole method initialize() where fill required attributes. After context initializer is defined in ASG you can attach it to the permission or to the role. If you’ve chosen the second option, initialized data will be available for all permissions of that role (in fact, for all constraints that role’s permissions contain).
Despite the fact that this feature is already working we have a strong belief that we can always do things better, so we really appreciate your valuable feedback and suggestions.
Alex