After we created our guinea pig in the previous step, it’s now time to integrate MoSKito-Essential into our application. Our plan for today is:
- Add monitoring to the core parts of our code.
- Download and connect MoSKito Inspect
- Learn about WebFilters and Listeners
At the end of the guide we want to:
- see the access data in MoSKito Inspect,
- record a Journey.
Lets go!
I. Mark classes for monitoring.
First, we want to add some classes to the monitoring. We don’t want to add all classes, because it just spams the monitoring. For example, this class:
public class ShopableItem {
	private int price;
	private String name;
	private Category category;

	public ShopableItem(){
	}
...
}
which is a simple DTO which doesn’t need to be monitored. We should monitor classes that actually do some job, have some payload. In case of a spring application, these classes should at least include Services and Controllers.
In general, everything that does something of interest should be monitored, but the ‘property holders’ classes shouldn’t.
To monitor our Services and Controllers, we are going to use the AOP Integration. We could also use Proxies or even Spring-aop, but AOP is the best right now.
To enable AOP Integration, we have to perform 2 steps:
- Add dependencies and build plugins to the pom.xml.
- Annotate classes.
II. Declare dependencies
We are going to add some dependencies to MoSKito artifacts in the course of this guide, so it makes sense to define a variable for version, to use same version in all artifacts, and to be able to change it easy. In our case the version is 2.8.5.
Add those lines somewhere in your pom.xml, preferably above the dependencies section, since this is where we’re going to use it:
<properties>
    <source-version>1.8</source-version>
    <target-version>1.8</target-version>

    <moskito.version>2.8.5-SNAPSHOT</moskito.version>
    <aspectj.version>1.8.7</aspectj.version>
    <aspectj-maven-plugin.version>1.10</aspectj-maven-plugin.version>
    <aspectj-maven-plugin.complianceLevel>1.8</aspectj-maven-plugin.complianceLevel>
</properties>
Now add the dependencies, needed for AOP:
      <dependencies>
        <dependency>
            <groupId>net.anotheria</groupId>
            <artifactId>moskito-core</artifactId>
            <version>${moskito.version}</version>
        </dependency>
        <dependency>
            <groupId>net.anotheria</groupId>
            <artifactId>moskito-aop</artifactId>
            <version>${moskito.version}</version>
         </dependency>
      </dependencies>
and the AOP plugin in the build section.
<plugins>
    <plugin>
        <groupId>org.codehaus.mojo</groupId>
        <artifactId>aspectj-maven-plugin</artifactId>
        <version>${aspectj-maven-plugin.version}</version>
        <configuration>
            <complianceLevel>${aspectj-maven-plugin.complianceLevel}</complianceLevel>
            <source>${source-version}</source>
            <target>${target-version}</target>
            <aspectLibraries>
                <aspectLibrary>
                    <groupId>net.anotheria</groupId>
                    <artifactId>moskito-aop</artifactId>
                </aspectLibrary>
            </aspectLibraries>
        </configuration>
        <dependencies>
            <dependency>
                <groupId>org.aspectj</groupId>
                <artifactId>aspectjrt</artifactId>
                <version>${aspectj.version}</version>
            </dependency>
            <dependency>
                <groupId>org.aspectj</groupId>
                <artifactId>aspectjtools</artifactId>
                <version>${aspectj.version}</version>
            </dependency>
        </dependencies>
        <executions>
            <execution>
                <goals>
                    <goal>compile</goal>
                    <goal>test-compile</goal>
                </goals>
                <configuration>
                    <source>${source-version}</source>
                    <target>${target-version}</target>
                </configuration>
            </execution>
        </executions>
    </plugin>
</plugins>
Note: this guide was updated for 2.8.5. So you have to update moskito version in pom.xml.
However, we haven’t achieved much yet. We need to annotate the classes now. To do so, we open the ShopController, OrderController, HomeController and ShopServiceImpl classes and add @Monitor above the class declarations, like this:
@Monitor
public class ShopServiceImpl implements ShopService {
Your IDE should be able to suggest the right import for the @Monitor annotation, but in case it doesn’t, it is: net.anotheria.moskito.aop.annotation.Monitor.
After we made sure that build still builds, we can try to start the built application. We will see if it still works. The only new thing, after we open http://localhost:8080/burgershop/, are some new output lines in the logs, , like this one:
00:43:33.864 [http-bio-8080-exec-8] INFO n.a.m.c.r.ProducerRegistryImpl - Registry register producer: ShopController / OnDemandProducer (unlimited): ShopController:default:annotated
So, great, we now do have MoSKito integrated into our application, but we can’t see anything. Lets change this by connecting inspect.
III. Connect Inspect
To connect inspect we need to perform two steps: enable a connector inside our app and actually download and start inspect.
To enable MoSKito Inspect to connect to your application, we must start an endpoint in your application (which is in this case burgershop), and this is done by adding one dependency to the pom and one line to catalina.sh:
<dependency>
  <groupId>net.anotheria</groupId>
  <artifactId>moskito-inspect-remote</artifactId>
  <version>${moskito.version}</version>
</dependency>
Now, please locate your catalina.sh (or bat) and add following line to it, right on top:
export JAVA_OPTS="$JAVA_OPTS -DlocalRmiRegistryPort=9401"
This will tell the MoSKito Inspect endpoint to accept incoming RMI connections at port 9401. You can of course specify another port.
Now, please rebuild and restart your app.
So now we just have to download inspect from here: http://www.moskito.org/download.html or directly by this link. Note, you can always build your own MoSKito Inspect by simply putting the moskito-inspect-standalone war file in a servlet container of your choice, be it resin, tomcat or jetty. Just keep in mind that you will need a servlet3.0 compatible container, so tomcat5 or 6 won’t work. But for now let’s stay with our prepared download.
After you downloaded MoSKito Inspect archive unpack it somewhere. For example I did it under /opt:
cd /opt
tar -xzf ~/Downloads/moskito-inspect.tgz
cd moskito-inspect/
MoSKito Inspect download is basically a tomcat with a war file, so you can start it like a normal tomcat:
cd tomcat/
bin/startup.sh
Default port for MoSKito Inspect is 8088, simply because it seemed to have less conflicts as 8080. So you can access http://localhost:8088/moskito/
If you did everything right you will see this page a running MoSKito Inspect. 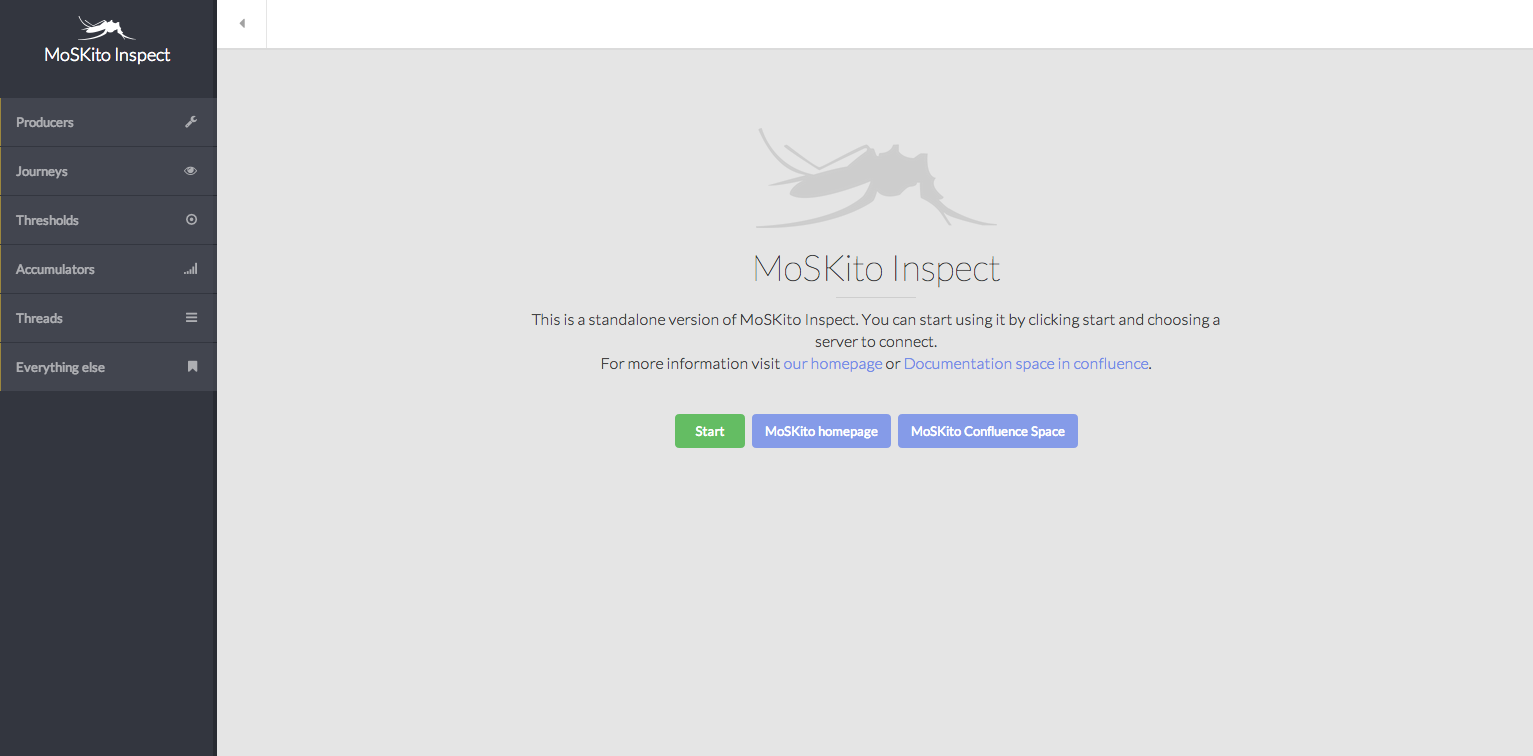
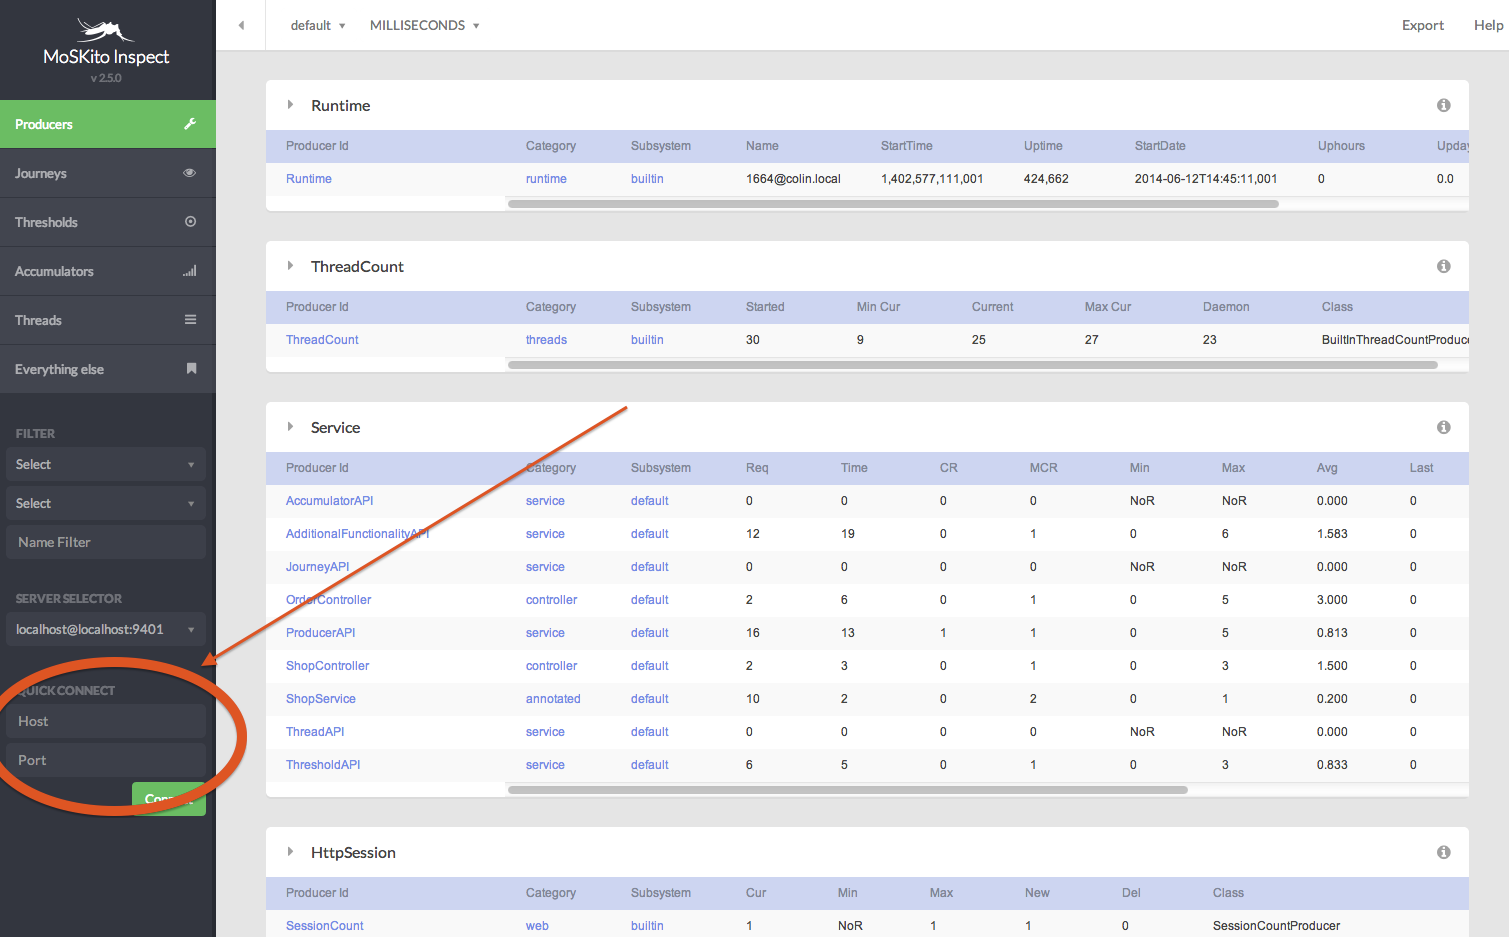
You can click around a little and celebrate 😉 But before you get too excited, what you see now is data from the MoSKito Inspect tomcat itself, not your burger-selling-app. To change it, you have to tell the Inspect to connect to the burgershop. Click on the producers tab (or any other tab). In the lower left part of the screen you will see a ‘QuickConnect’ box:
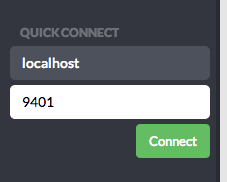
Enter localhost as host and 9401 as port and click Connect:
The screen should reload, and now you see data from your application. You can verify it, but clicking this url: http://localhost:8088/moskito/moskito-inspect/mskShowProducersByCategory?pCategory=controller
It will show you the previously annotated controllers and requests to them:

You can now make some orders in the shop and see the numbers increasing in the controllers overview.
We didn’t specify any category for the ShopService itself, so it will be under the default category for annotated classes which is … annotated: http://localhost:8088/moskito/moskito-inspect/mskShowProducersByCategory?pCategory=annotated
I will not describe the usage of the MoSKito Inspect here, you may find it in MoSKito Inspect User Guide. (Warning: at the time this guide is written, the User Guide still refers to 2.4.x version)
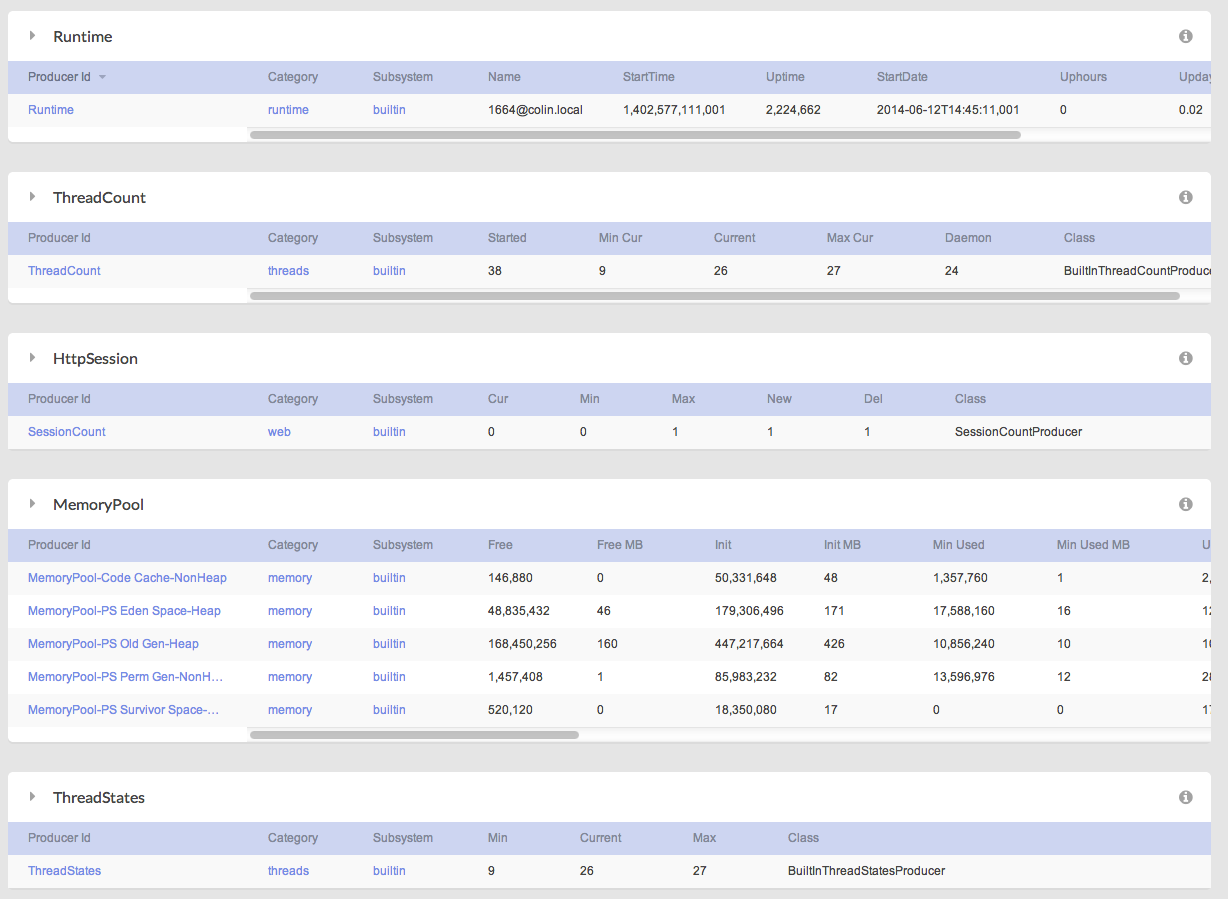
IV. Built-in stuff.
By adding the MoSKito Inspect Connector to our application we actually added some extra features, I would briefly describe here.
The built-in producers add some useful information about what’s happening in your app:
I will shortly name few:
Memory Pools
Memory pools are collecting information about memory usage in different memory spaces, being it old generation or young generation. This is very helpful to detect potential memory problems.
ThreadStates and ThreadCount
Those give you information about different states that you threads are in, and the amount of the threads in each state. Typically you would like to avoid having threads in blocked state.
HttpSession
The current session count as well as number of created and deleted sessions over time.
Accumulators
But you will also get some accumulators ready to use: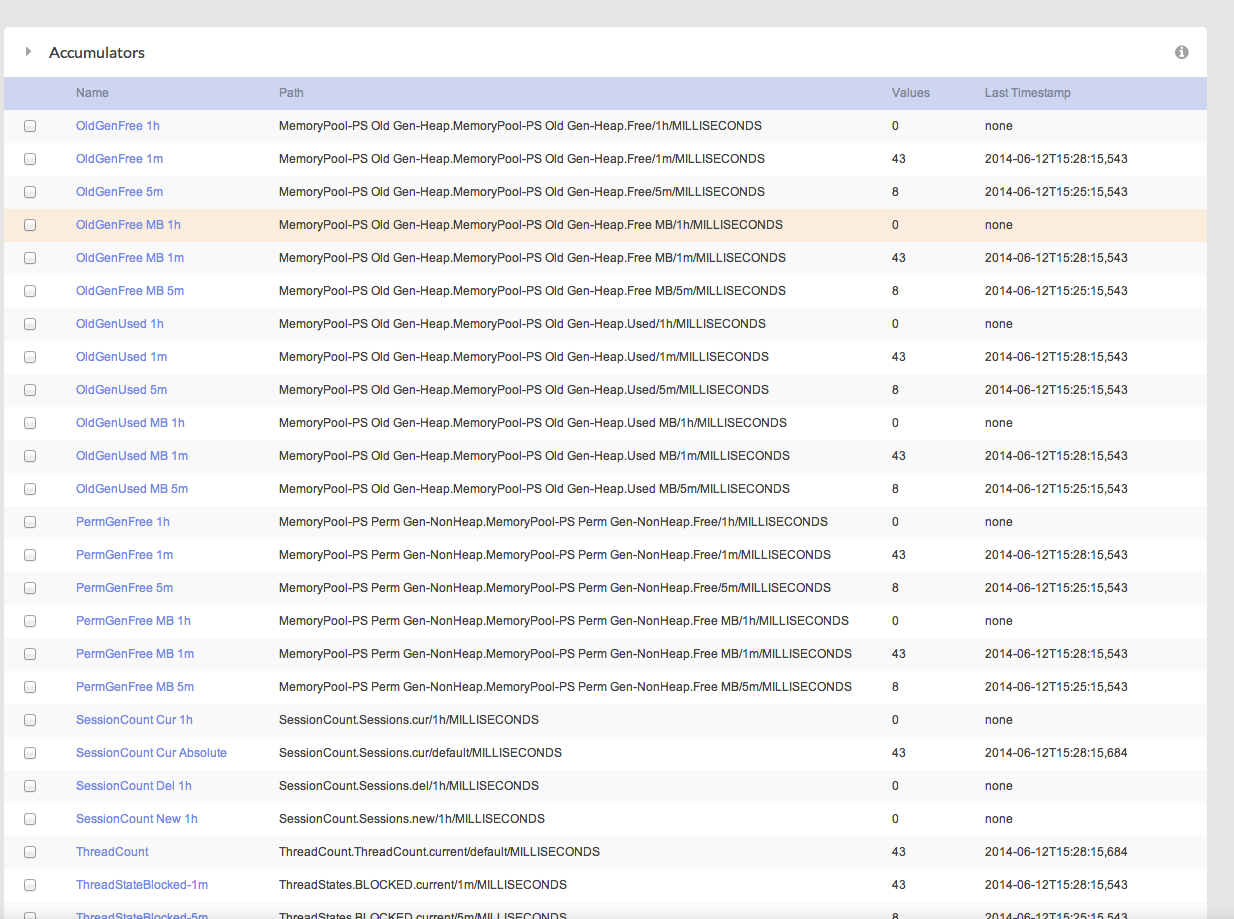
For example the development of your threads can be visualized out of the box:
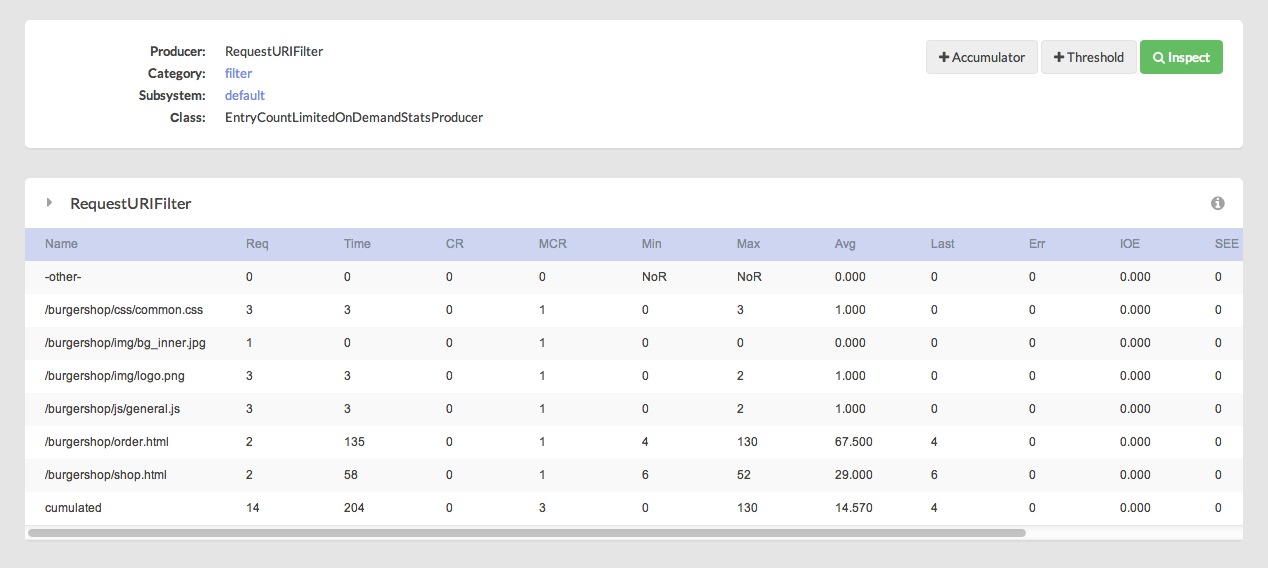
URLs
MoSKito also tracks all called urls in your application and many more things.
But the real jewel are the journeys:
V. Make our first Journey.
A Journey is a recording of user actions in the form of actual calls/steps that occur inside an application. Read more…
There are multiple ways to start the journey. One of the easiest is to supply a special parameter along with your request. MoSKito will check the presence of the parameter and record everything that happens in that user session.
To start our first Journey we call the Homepage of the Burgershop with the special parameter: http://localhost:8081/burgershop/home.html?mskJourney=start&mskJourneyName=GUIDE
The GUIDE journey will show up in MoSKito Inspect immediately (tab Journeys):
Now I can click in the application in one window and trace what it actually does in another. And the best thing is, the overhead of this production profiling is so minimal, that you actually can do it without harm to your users, what a normal profiler couldn’t do (or not named commercial products).
After performing a full order process (well in burgershop the whole process are three requests ;-)), I can see it at once:
I can click on one step and see all calls through all my monitoring stations (that is all classes annotated with @Monitor, configured with AOP or CDI, Filters, SQL-Interceptors etc) including parameters and return values:
Now we can see what is happening in our application when the order is placed: which Controller calls which Service, what the Service does. And how long it takes. And what parameters are submitted. And the failures (if any).
The Burger Shop is a pretty simple application, therefore there is not much to see in the above journey. But I’ve seen applications with journey’s length up to 10000 steps, and believe me: there are a lot of surprises in analysing such long calls.
The above topic should give you a brief idea of what the journeys are capable of. We will return to the Journeys in later steps, especially when we talk about the Analyze function.
So, what have we done today?
- We integrated MoSKito into our application.
- We installed and connected MoSKito Inspect.
- We added monitoring for key classes of our application.
- We recorded a Journey.
In the next chapter, we’ll be adding a Counter, a Producer with custom stats object, thresholds and accumulators. After that, we will add another server and put both servers into Live Monitoring with MoSKito-Control. And last but not least – we’ll set up MoSKito-Central.
Enjoy and see you soon!
NOTE: Guys thank you for your interest in MoSKito, but this blog is not a support forum, if you have a problem write to support@moskito.org or into our olark channel (on www.moskito.org) or open a github issue: https://github.com/anotheria/moskito/issues or a jira issue: https://jira.opensource.anotheria.net/projects/MSK (Jira requires registration but its free).





The complete MoSKito integration guide – Step 0 | anotheria devblog
[…] ← Previous Next → […]
The complete MoSKito integration guide – Step 2 – Add some counters | anotheria devblog
[…] ← Previous […]
The complete MoSKito integration guide – Step 3 – Custom producers | anotheria devblog
[…] previous steps we were talking about general integration of MoSKito and webui as well as adding custom counters. Today we are going to dive in a little bit deeper and build own […]
Scott Long
Hi, thanks for providing the details. However, I got status code 404, while clicking this link ‘http://localhost:8080/burgershop/mui/mskShowAllProducers’ from the middle of this page. Do I need to do something with the web.xml?
Thanks, Scott
Scott Long
Seems not an issue after upgrading Tomcat from 5 to 7.
Leon
Hi Scott,
The problem with tomcat5 (and 6 for that matter) is that we are using web-fragments to configure MoSKito filter and other stuff. The web-fragments are a feature of servlet 3.0 and neither tomcat5 nor tomcat6 support it. But you shouldn’t really run anything on a 10 years old tomcat 5 anyway 😉
regards
Leon
Malte
The link to “BuiltIn producers” is referenced wrong. It points to localhost, I don’t think that this is expected? 😀
Leon
Actually it was, what would you point it to? 🙂
Look, example is all about localhost, so if you followed previous steps it actually will point to your local installation and open a working screen.
Bertrand
Hi,
in our company we are looking for a tomcat monitoring tool.
We would like to monitor or answer the question
“which session is using which JDBC connection?”.
I found moskito and wanted to test it.
I am using tomcat 8, and moskito-inspect as standalone.
moskto-inspect worked well, i can also connect to the RMI Port 9401
I insert the moskito-Annotation in my App,
but i can t see my controler as shown in picture “BurgerSHopController.png”
In the service-Table there is no controller Category.
Any suggestion what im doing wrong?
thx,
Bertrand
Leon
Hello Bertrand,
have you added the AOP processing to your build pipe (maven plugin) ?
Alex
For Windows users:
the right command to add in catalina.bat is
set “JAVA_OPTS=%JAVA_OPTS% -DlocalRmiRegistryPort=9401”
Newest. Hottest. Tracers. | anotheria devblog
[…] But let’s walk through the details with the Burgershop Example we already used so often. […]
Matteo Turra
FYI: default username and password in new Moskito-inspect interface are: moskito-user & 123.
Gyula
Hi,
after changing pom.xml due to AOP described above, I can’t build application:
Failed to execute goal org.codehaus.mojo:aspectj-maven-plugin:1.4:compile (default) on project burgershop: Compiler errors:
error at (no source information available)
C:\Users\BGy\Documents\NetBeansProjects\burgershop\src\main\java\de\zaunberg\burgershop\ui\ShopItemBean.java:0::0 Internal compiler error
org.aspectj.apache.bcel.classfile.ClassFormatException: File: ‘java/lang/CharSequence.class’: Invalid byte tag in constant pool: 15
at org.aspectj.apache.bcel.classfile.ClassParser.readConstantPool(ClassParser.java:192)
(Netbeans 8.2 with bundled maven 3.0.5, Tomcat 8.5.8, jdk 1.8.0_112)
Any suggestion what im doing wrong?
Thanks!
Gyula
Sollution:
org.codehaus.mojo
aspectj-maven-plugin
1.10
net.anotheria
moskito-aop
1.6
1.6
1.6
compile
Leon
Guys, one note, this is not a support forum, if you need help please write to support@anotheria.net or use our olark channel!
What’s going on? – anotheria
[…] from it’s download page as always. Be also sure to check the Integration Guide and the Step by Step Integration if you are new to […]
Amuda
For Spring Boot project, how am I expected to include this line
“export JAVA_OPTS=”$JAVA_OPTS -DlocalRmiRegistryPort=9401″”
Spring Boot doesn’t have catalina.sh or catalina.bat